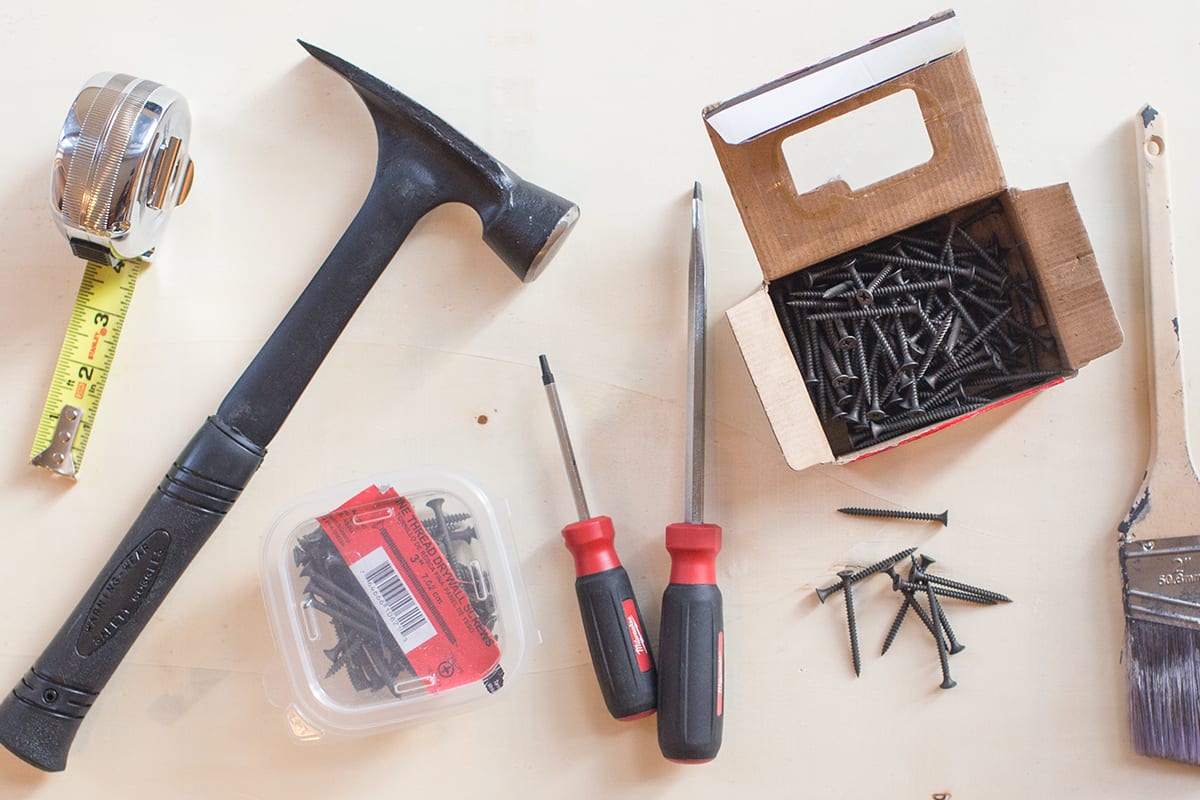
There’s something immensely satisfying about rolling up your sleeves and making something out of nothing. You get to flex your resourcefulness and creativity, and show off some tool-wielding skills that set you apart from the rest of the food chain.
So come as the evolved man that you are and upgrade your shelter with these easy DIY projects. They require nothing more than a few tools, a little bit of ambition, and a weekend afternoon. And the best part? You don't have to interpret directions in Swedish.
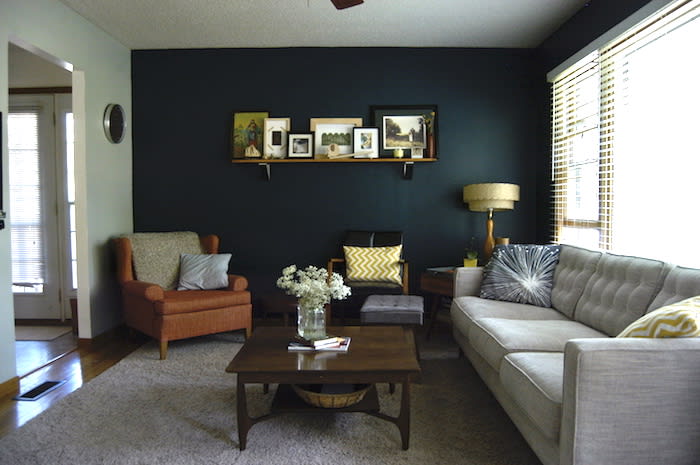
Paint an Accent Wall
You’ve got an adventurous streak in you, and you want to show it. Painting even just one wall of a room can be all it takes to get the change of scenery you need, and the great thing about paint is that you can swap out colors as your tastes and decor change. You’ll be surprised by the dramatic dimension it adds to your space, and how little time it takes to do.
When choosing an accent wall color, consider opting for a hue within the same color family as some of your decor or accent furniture. That'll help keep your room looking cohesive.
We like navy blue, forest green, and dark gray, but go with whatever strikes you at the paint store. Feeling artsy? Try chalkboard paint. And once you're done, add some wall art. You can never go wrong with a handsome black and white photo print.
Choose a wall that directs you to the natural focal point of the room. For instance, your accent wall should highlight the fireplace or the head of the bed, not behind the couch.
Things You'll Need
Paint, primer, two paint rollers, an angled brush, two paint trays, painters’ tape, and plastic covering to protect your floor.
How to Do It
Remove any furniture or decor around your designated accent wall. Sponge it off with a light solution of water and little dishwasher detergent to clean any stains or dust. Wait to dry.
Apply painter’s tape where the accent wall meets the ceiling, floor, windows, and any other borders where you won’t want paint.
Pour primer into the paint tray. Evenly apply primer onto paint roller and roll an even coat on the wall. Wait to dry. Rinse off the primer from the tray or use a new one for your paint.
Pour paint into a clean tray. Once the primer is dry, take the brush and paint a border that’s flush with the taped borders of your accent wall, creating a painted "frame". This will help ensure you’ve covered all the edges.
Evenly apply paint onto your paint roller and roll the paint onto the wall in a W or M shape until the whole wall is covered.
Remove the tape while the paint is still wet. Wait for paint to dry before putting your furniture back.
Decorate as needed. Bask in the glory of your masterpiece.
Build Industrial-Style Pipe Shelves
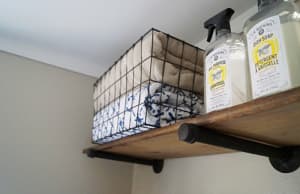
Floating shelves are an affordable way to save valuable floor space in your home, especially for urban dwellers. The heavy-duty pipe detail adds an industrial-inspired element to your decor, instantly elevating your room’s look (both literally and figuratively).
As far as where to install them, the possibilities are endless. Consider where you’d like to add extra storage space. Need a spot to stack bedtime reads or add lighting? Flank your bed with a pair of shelves. Have a cluttered desk? Install some above it to stow your work supplies and some simple decorations. Stacking spare toilet paper on the back of your toilet? Yeah, you know the drill.
Your shelf and pipe frame can come in a wide variety of colors and configurations, which are up to you. A dark wood stain will give your shelf a rich and warm finish, or you can just treat the wood with a little bit of mineral oil for a more natural look. There are also several metal types you can choose from for your pipes – hit up your local hardware store and see what they've got in stock. If you can’t find a finish you like, use spray paint to customize the color.
Before you begin, read up on the finer points of building your own industrial-style furniture, and scope out some photos online so that you have a clear idea of what you want yours to look like.
Things You'll Need
Two ¾" floor flanges, two ¾" x 10" steel nipples, two ¾” caps, one 4½’ x 10” wood board, wood stain, eight screws, ribbed plastic anchors, sandpaper, a beam level, and measuring tape.
How to Do It
Use measuring tape and a beam level to mark off on the wall where you’ll install the shelf. Mark where you'll screw the floor flanges in to secure the steel nipples. Make sure the distance is several inches less than the length of the wood board.
Attach the flanges, steel nipples, and caps together so you have two shelf supports. Screw them into the wall where marked (we recommend also using ribbed plastic anchors to make sure the drywall can support it).
Sandpaper your wood board and apply wood stain. Wait to dry.
Place the board onto your metal brackets.
Start stacking away. Repeat as necessary.
Build a Custom Garment Rack
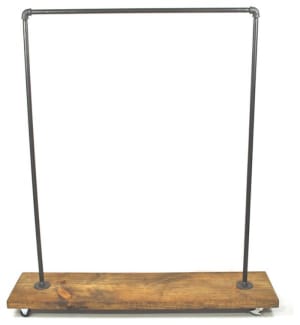
Now that you’ve got industrial-style pipes on your mind, let’s take it up a notch. By adding a few more attachments and a larger wood board, you can craft a garment rack in a single Sunday afternoon.
It'll give you a place to display your best threads, lay out what you're gonna wear the next day, and save on closet space (which, let’s face it, we could all use a little more of).
Things You'll Need
Two ¾" x 5’ pipe, two ¾” pipe elbows, three ¾” flanges, one wood board for the base (make sure this exceeds the length of the pipe by at least 4"), wood stain, four wheels, and screws.
How to Do It
Sand and stain the wood base. Wait to dry.
On the underside of your wood base, mark four corners of the board where you want your wheels. Drill pilot holes into the marks and screw on the wheels. When drilling the holes, be careful not the drill through the other side of the base.
Attach the pipes together with the elbows so that it makes a "U" shape. Attach flanges to the exposed pipe ends.
Place the attached pipes on top of the wood base, flanged end first, and mark on the wood board where the flanges should be attached.
Drill pilot holes where marked and screw on the flanges.
Appoint your outfit for tomorrow. Hang as desired.
Hang Some Wall Hooks
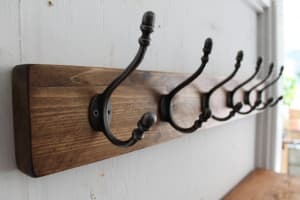
Secure wall hooks to a wood board. Mount the board on your wall. Boom: extra space to hang your favorite threads.
It doesn’t have to be limited to clothing, either – hang up your favorite ball cap or everyday bag, a quality umbrella, an eye-catching scarf, or any other out-the-door essentials. When they're all corralled into one spot, you can make a smooth exit in the morning.
A set of hooks will work well in your bathroom, too, for hanging towels and bathrobes.
Things You'll Need
1x4 wood board cut down to desired length, wood stain, some cool-looking hooks, screws, anchor screws, tape measure, and a beam level.
How to Do It
Stain your wood board with desired finish. Wait to dry.
Using a tape measure, mark on the wood board where you want to place your hooks. Try to keep hooks at least 10 inches apart to give bulkier items like coats enough breathing room.
Pre-drill holes where marked. Screw hooks into the wood board.
Using a beam level, mark on the wall where you want to install your wood board.
Install the wood board on your wall with anchor screws, or drill right through the board into the wall.
Hang your hat and call it a day.
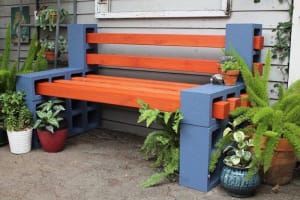
Build an Easy Outdoor Bench
We’ve all had enough of winter. And let’s be honest, your backyard probably needs a little fixing up before it’s ready to host a barbecue.
Outdoor furniture can be pricey, but you don't have to empty your wallet if you want a nice place to kick back in your yard. This DIY bench is absurdly easy to make, will look great, and costs next to nothing. So you can invest in more important things like that inflatable palm tree cooler you’ve had your eye on, or a wood six pack to show off your home brew the next time you invite people over to grill.
Things You'll Need
12 cinder blocks, four 4"x4”x10’ wood beams, wood stain, sandpaper, concrete bonding adhesive, outdoor seat cushions and pillows, and a handsome, all-weather utility blanket.
How to Do It
Stand up four cinder blocks vertically and set them side-by-side. Top off with two more, laid down horizontally. Repeat with the remaining six cinderblocks. These will be the two sides to your bench.
Once you’re happy with the arrangement, glue the cinder blocks together with concrete bonding adhesive for each side.
Sand the wood beams and apply wood stain. Wait to dry.
Set cinder block sides apart according to your desired bench width. Feed the wood beams through the top holes of each side.
Top it off with outdoor cushions, pillows, and a nice throw blanket. This part is important – it makes the thing look handsome and adult, rather than something you just built in an hour (even though you did).
Relax and enjoy.